MVVMパターンでUIを実装する場合、 ViewModelからModelを操作(通信)する処理を記述する場合、 MVVMLight で提供される Messenger クラスを使用した Messanger パターン を使用して View内でメッセージをサブスクライブする方法があります。また、その派生として System.Windows.Interactivity 名前空間で提供される Attached Behavior パターンを実装し Attached Behavior 用のクラス内 Messanger パターンを利用して メッセージをサブスクライブを実装する方法があります。今回は別の方法として Prism ライブラリで提供される Prism.Interactivity.InteractionReqeust 名前空間のクラスを利用して ViewModel から View を操作する方法を記載します。参考になりそうなURLを下記に記載します。
- Prism 4.1 - Developer's Guide to Microsoft Prism
http://msdn.microsoft.com/en-us/library/gg406140.aspx
- Prism Documentation
http://compositewpf.codeplex.com/releases/view/55580
- Prism Community
http://compositewpf.codeplex.com/
- Prism 4.1 - February 2012
http://www.microsoft.com/en-us/download/details.aspx?displaylang=en&id=28950
- Prism Online Document
http://msdn.microsoft.com/en-us/library/gg406140.aspx
今回紹介する InteractionRequest は Prism Document の 6: Advanced MVVM Scenarios で記載されています。
検証環境
- Visual Studio 2012 Ultimate(Visual Studio 2010 でもOKのはず。)
- .NET 4.5
- Prism 4.1
今回 Prism ライブラリを利用したサンプルを紹介します。ただ、Prismライブラリのなかで Prism.Interactivity.InteractionRequest 名前空間のクラスは非常に小規模なクラスで構成されています。Prism ライブラリはソースが提供されているので、 InteractionRequest のみを流用したい場合は ソースを参考に独自で実装できると思います。ソースを見ればわかりますがInteractionRequest 名前空間のクラスは本質的には Expression Blend SDKで定義される EventTrigger クラスを少しだけ変更しているだけなのです。実際、Webを検索すると、InteractionRequest 名前空間のクラスを参考にして ViewModel と Modelを操作するサンプルを独自で実装し掲載していると思われる記事がありました。
1. dll参照を追加する
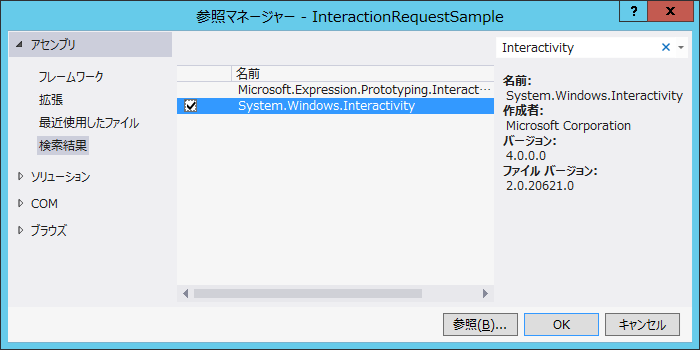
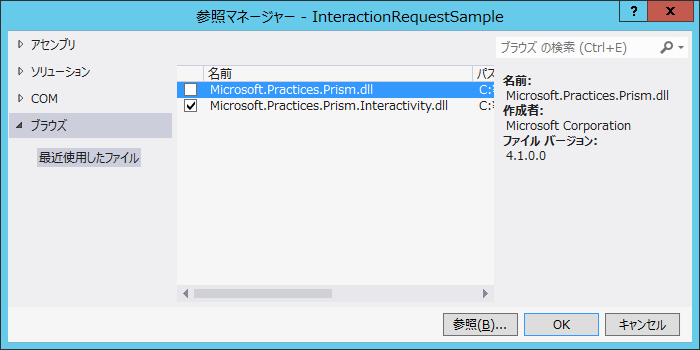
Visual Studio 2012 を起動し、WPFプロジェクトを作成します。ソリューションエクスプローラのプロジェクトを右クリック→参照の追加で Expression Blend SDK で提供される System.Windows.Interactivity.dll と Prism ライブラリで提供される Microsoft.Practices.Prism.Interactivity.dll の参照を追加します。
下図でSystem.Windows.Interactivity の参照を追加しています。Expression Blend SDK はMicrosoft Expression Blend 4 Software Development Kit (SDK) for .NET 4でダウンロードできます。
下図で Microsoft.Practices.Prism.Interactivity.dll の参照を追加しています。PrismライブラリはPrism 4.1 - February 2012からダウンロードできます。
2. サンプルソースの作成
ViewModel(ただし、本サンプルではViewでそのままコマンドを実装しています) から View を操作するためのメッセージを処理するCloseActionクラスを次のように作成しました。Invokeの引数で渡される InteractionRequestEventArgs は Prism の InteractionRequestTrigger で IInteractionRequest をソースオブジェクトとして指定するとRaisedイベントから渡されるイベント引数です。詳細はPrismライブラリのソースを参照してください。
namespace InteractionRequestSample
{
    class CloseAction : TriggerAction<DependencyObject>
    {
        protected override void Invoke(object parameter)
        {
            var args = parameter as InteractionRequestedEventArgs;
            if (args == null)
            {
                return;
            }

            var win = this.AssociatedObject as Window;
            if (win == null) return;

            MessageBoxResult result = MessageBox.Show(args.Context.Content.ToString(), args.Context.Title, MessageBoxButton.OKCancel);
            if (result == MessageBoxResult.OK)
            {
                win.Close();
            }
            // コールバック関数でViewModelに結果を伝えることも可能
            args.Callback();
        }
    }

}
もう一パターンとして CloseAction2 というクラスも作成します。本クラスでは DependencyProperty を使用して 閉じる処理前に表示するメッセージボックスのタイトルとコンテンツ用テキストをxaml 上で直接設定できるようにしています。
namespace InteractionRequestSample
{
    class CloseAction2 : TriggerAction<DependencyObject>
    {
        public static readonly DependencyProperty TitleProperty =
            DependencyProperty.Register(
                "Title",
                typeof(string),
                typeof(CloseAction2),
                new PropertyMetadata(null));

        public static readonly DependencyProperty ContentProperty =
            DependencyProperty.Register(
            "Content", typeof(string), typeof(CloseAction2), new PropertyMetadata(null));

        public string Title
        {
            get { return (string)GetValue(TitleProperty); }
            set { SetValue(TitleProperty, value); }
        }

        public string Content
        {
            get { return (string)GetValue(ContentProperty); }
            set { SetValue(ContentProperty, value); }
        }

        protected override void Invoke(object parameter)
        {
            var win = this.AssociatedObject as Window;
            if (win == null) return;

            MessageBoxResult result = MessageBox.Show(Content, Title, MessageBoxButton.OKCancel);
            if (result == MessageBoxResult.OK)
            {
                win.Close();
            }

        }
    }
}
次に 既定で作成された xaml ファイルMainWindow.xaml を編集します。Windowタグで名前空間 xmlns:i, xmlns:prism, xmlns:local が今回サンプルように追加したネームスペースです。重要な場所は Interaction.Trigger タグで、 InteractionRequestTrigger を使用して VIewModelからのメッセージを処理する Actionクラスを定義しています。
<Window x:Class="InteractionRequestSample.MainWindow"
        xmlns="http://schemas.microsoft.com/winfx/2006/xaml/presentation"
        xmlns:x="http://schemas.microsoft.com/winfx/2006/xaml"
        xmlns:i="clr-namespace:System.Windows.Interactivity;assembly=System.Windows.Interactivity"
        xmlns:prism="clr-namespace:Microsoft.Practices.Prism.Interactivity.InteractionRequest;assembly=Microsoft.Practices.Prism.Interactivity"
        xmlns:local="clr-namespace:InteractionRequestSample"
        Title="MainWindow" Height="350" Width="525"
        x:Name="win1">
    <StackPanel>
        <Button Content="Close" Command="{Binding CloseCommand, ElementName=win1}"></Button>
        <Button Content="Close2" Command="{Binding Close2Command, ElementName=win1}"></Button>
    </StackPanel>
    <i:Interaction.Triggers>
        <prism:InteractionRequestTrigger
            SourceObject="{Binding CloseRequest, ElementName=win1}">
            <local:CloseAction></local:CloseAction>
        </prism:InteractionRequestTrigger>
        <prism:InteractionRequestTrigger
            SourceObject="{Binding Close2Request, ElementName=win1}">
            <local:CloseAction2 Title="確認テスト" Content="クローズ確認パターン2"></local:CloseAction2>
        </prism:InteractionRequestTrigger>
    </i:Interaction.Triggers>

</Window>
上記サンプルでInteractionRequestTrigger タグの属性 SourceObject にイベントをサブスクライブする対象の ViewModel(サンプルではView)のプロパティを設定しています。PrismのInteractionRequestTrigger では 指定するプロパティは IInteractionRequest インタフェース(Raised イベントが定義されています) を実装しているクラスであることが必要です。というのも InteractionRequestTrigger は EventTrigger を継承し、固定のイベント Raised をサブスクライブするように実装されているためです(逆にやっているのはこれだけ)。
あとは xamlで設定されている Command とInteractionRequest を MainWindow.xaml.cs に定義します。ViewModelからModel クラスに対してなんらかの操作を行う場合は、 IInteractionRequest の Raised イベントを起動します。本例では Prismライブラリで事前に定義されている InteractionRequest<T>のRaise メソッドを使用してイベントを起動します。Raisedイベントが起動すると InteractionRequestTrigger が xamlで定義した各Actionクラスを起動します。
namespace InteractionRequestSample
{
    /// <summary>
    /// MainWindow.xaml の相互作用ロジック
    /// </summary>
    public partial class MainWindow : Window
    {
        public MainWindow()
        {
            InitializeComponent();
        }

        private ICommand _closeCommand = null;
        public ICommand CloseCommand
        {
            get
            {
                if (_closeCommand == null)
                {
                    _closeCommand = new RelayCommand(new Action<object>(x => ProcessClose()));
                }
                return _closeCommand;
            }
        }

        private InteractionRequest<Notification> _closeRequest = new InteractionRequest<Notification>();

        public InteractionRequest<Notification> CloseRequest
        {
            get { return _closeRequest; }
        }

        private void ProcessClose()
        {
            Notification n = new Notification();
            n.Title = "確認";
            n.Content = "終了します";

            _closeRequest.Raise(n, new Action<Notification>( x => {}));
        }


        private ICommand _close2Command = null;
        public ICommand Close2Command
        {
            get
            {
                if (_close2Command == null)
                {
                    _close2Command = new RelayCommand(new Action<object>(x => ProcessClose2()));
                }
                return _close2Command;
            }
        }

        private InteractionRequest<Notification> _close2Request = new InteractionRequest<Notification>();

        public InteractionRequest<Notification> Close2Request
        {
            get { return _close2Request; }
        }

        private void ProcessClose2()
        {
            // 今回は Prismフレームワークの InteractionRequest を流用するため からのNotificationクラスを作成
            Notification n = new Notification();

            _close2Request.Raise(n, new Action<Notification>(x => { }));
        }

    }
}
今回は 簡単のため ViewModelを使用していませんが 本来は ViewModelで定義する想定なので注意してください。
3. まとめ
非常に簡単なサンプルですが説明は以上です。
書いてみてなんですが、MessangerPatternで実装した場合も含めて MVVM原理主義的になるとコードがいたるところに記述され(Visual Studioで追いにくくなり)わけわからなくなるなぁと思いました。意地でもコードビハインドにコードをかかねぇといった手段と目的が入れ替わった感じです。PrismのInteractionRequestを使用する場合 うまくActionクラスを再利用できるように定義する必要があると思います。
一方で依存性がなくなることで ViewModelのテスタビリティが高くなるというのも理解できます。
MVVMパターンにこだわるのでなく、適材適所で使用するパターンを考え、規模や内容(単にコントロールの機能をデモする等)によって イベントドリブンな書き方をしたりMVPパターンを使用したり、コードビハインドに一部ソースを記述するなどある程度パターンを崩したり原則を緩める(ViewModelはViewを参照できるまたはその逆等)なりしてよいのではと個人的に考えています。

さんのコメント: さんのコメント: